SwiftUI + Combine을 이용하여 Fleek Copy app 만들기(3-4)
안녕하세요.
오늘은 이전 포스트에 이어, timer관련된 내용을 이야기 해보도록 하겠습니다.
저번시간까지 작성된 코드는 아래와 같습니다.
import SwiftUI
import Combine

struct SplashView: View  {
    @State private var progress: Float = 0.0
    @State private var isComplete: Bool = false

    let duration: Double = 3.0

    var timer: Publishers.Autoconnect<Timer.TimerPublisher> {
           Timer.publish(every: 0.01, on: .main, in: .common).autoconnect()
    }

    var body: some View {
        Group {
            if !isComplete {
                VStack {
                    Text("FLEEK")
                        .foregroundColor(.red)
                        .fontWeight(.heavy)
                        .font(.largeTitle)
                    Text("당신의 운동을 의미있게!")
                        .foregroundColor(.white)

                    ProgressView(value: progress)
                        .animation(.linear(duration: duration), value: progress)
                        .tint(.red)
                        .frame(width: 160)
                }

                .opacity(isComplete ? 0 : 1)
                .frame(maxWidth: .infinity, maxHeight: .infinity)
                .background(.black)
            } else {
                MainTabView()
                    .opacity(isComplete ? 1 : 0)
            }
        }
        .onReceive(timer) { _ in
            if progress < 1.0 {
                progress = min(1.0, progress + 0.004)
            } else {
                withAnimation(.easeOut(duration: 1.0)) {
                    isComplete = true
                }
            }
        }
    }
}
위 코드에서 사용한 Timer를 살표보도록 하겠습니다.
TimerPublisher
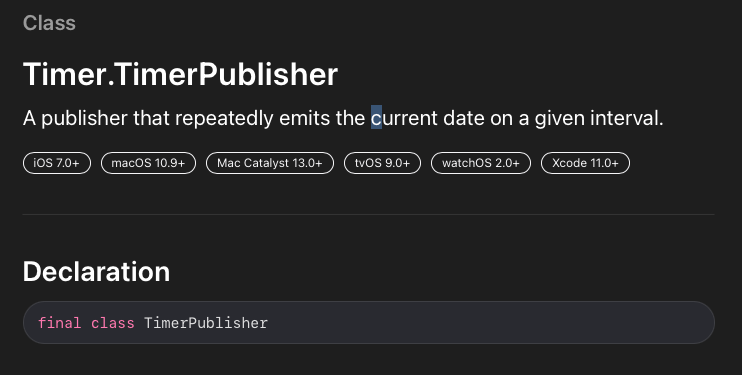
주어진 interval마다 현재의 시간을 emit하는 publisher 라고 설명하고 있습니다.
Timer.publish(every: 0.01, on: .main, in: .common).autoconnect()
0.01초마다 main Runloop에 common 모드로 동작하는 TImer.TimerPublisher를 생성합니다.
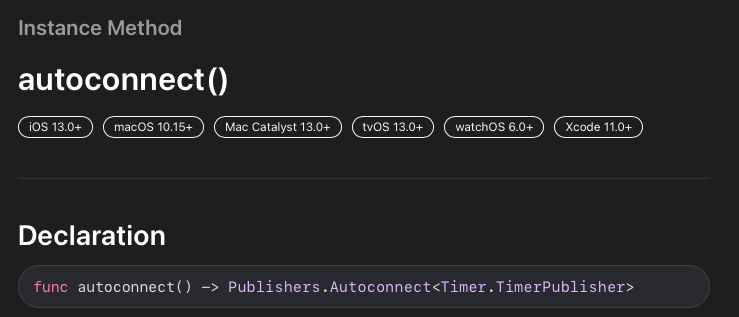
여기서 봐야할 부분은 autoconnect()라는 메소드 인데요.
autoconnect()
Publishers.Autoconnect
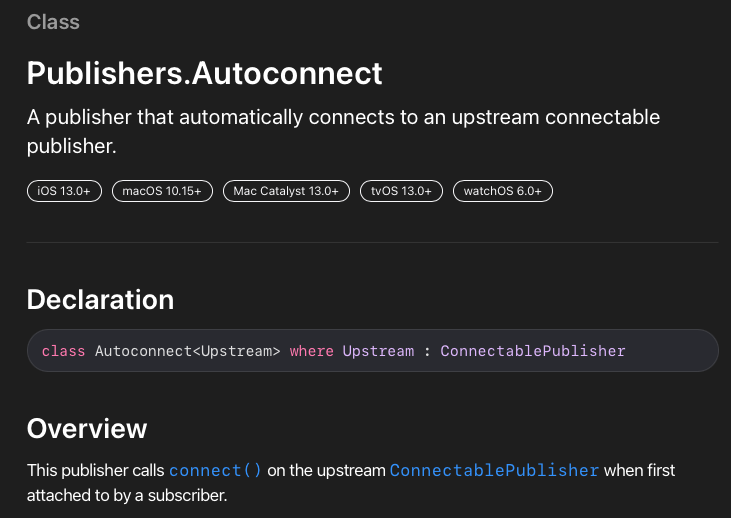
- upstream연결이 가능한 Publisher에 자동으로 connect되는 publisher라고 되어있습니다.
- 감이 잘 오지 않네요. Overview를 읽어보겠습니다.
- 해당 Publisher에 subscriber가 구독을 시작하면 자동으로 connect()를 호출해 준다고 되어있네요.
- connect()는 뭐하는 녀석일까요??
Connect()
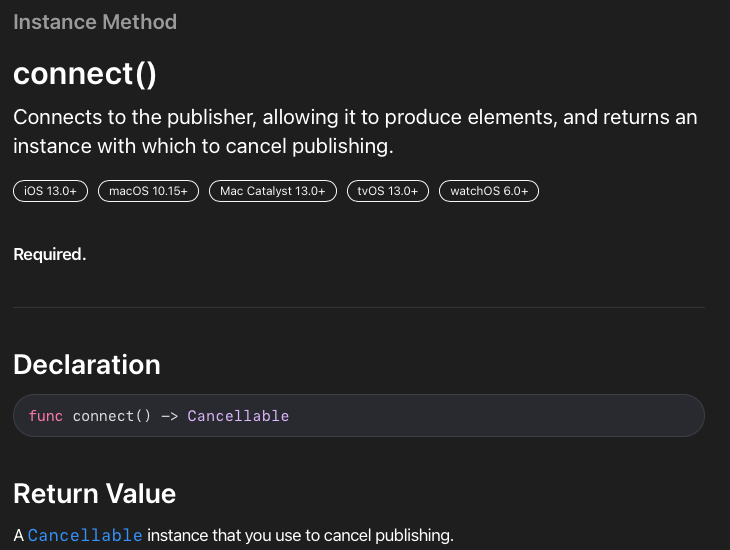
- publisher에 연결하여 요소를 생성할 수 있으며, 취소할 인스턴스(cancellable)을 반환합니다.
- 역시나 뭐라고 하는지 잘 모르겠네요.. publihser에 연결하고.. cancellable을 반환한다..
정확히 뭘 하는지 설명이 부족한듯 하여 해당 메소드를 정의해둔 protocol을 찾아가보도록 하겠습니다.
connect()메소드는 ConnectablePublisher라는 프로토콜에 정의된 함수입니다.
ConnetablePublisher는 어떤 publisher일까요??
ConnectablePublisher
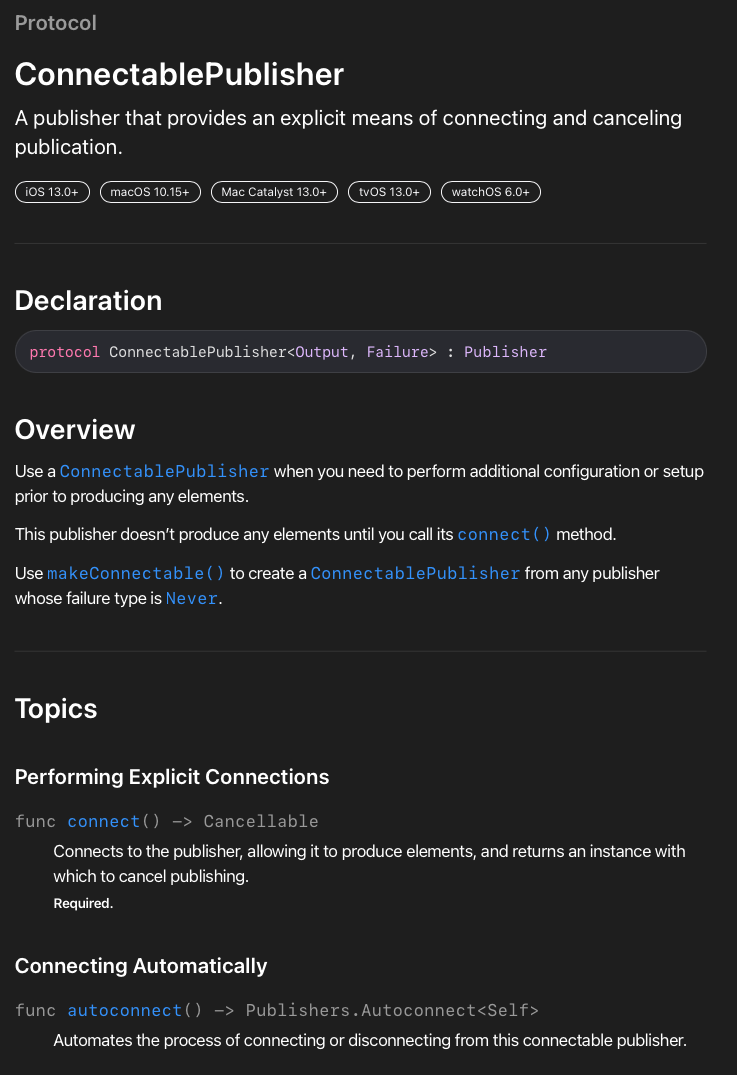
publisher를 connect하고 cancel 할 수 있는 explicit 한 방법을 제공하는 publication이라고 합니다.
아직은 이해가지 않으니, overview로 넘어가보도록 하겠습니다.
- 요소를 생성하기 전에 추가 구성이나 설정을 수행해야 할 때 ConnectablePublisher를 사용하세요.
- 이 게시자는 connect() 메소드를 호출할 때까지 어떤 요소도 생성하지 않습니다.
- makeConnectable()을 사용하여 실패 유형이 Never인 게시자로부터 ConnectablePublisher를 만드세요.
- 해당 부분은 내용이 길어질것 같아 나중에 Combine 정리파트에 별도로 다루도록 하겠습니다.
저희가 궁금했던건 connect() 인데요, 설명을 보자면 해당 ConnectablePublisher에 connect() 메소드를 호출하기 전까지는, 어떠한 동작도 하지 않고, connect()가 되면 이벤트를 방출합니다.
import SwiftUI
import Combine

struct SplashView: View  {
    @State private var progress: Float = 0.0
    @State private var isComplete: Bool = false

    let duration: Double = 3.0

//1. autoconnect()로 설정되어있으니, 해당 timer가 구독되면 0.01초마다 이벤트가 방출됩니다.
    var timer: Publishers.Autoconnect<Timer.TimerPublisher> {
           Timer.publish(every: 0.01, on: .main, in: .common).autoconnect()
    }

    . . .
  //onReceive 메소드에서 timer가 구독이되면, 0.01초씩 perform closuer가 호출됩니다.
        .onReceive(timer) { _ in
            if progress < 1.0 {
                progress = min(1.0, progress + 0.004)
            } else {
                withAnimation(.easeOut(duration: 1.0)) {
                    isComplete = true
                }
            }
        }
    }
}
주석을 달아둔 부분을 보면
- timer는 autoconnect()속성으로 선언되어져 별도의 connect()를 호출하지 않아도, 구독과 동시에 이벤트가 방출되도록 하였습니다.
- onReceive 에 parameters로 구독할 publisher를 넘겨주어, autoconnect() 속성때문에, 이벤트 방출이 시작되며 해당 perform closuer로 방출된 이벤트가 넘어오게 됩니다.
근데 제가 하고싶은건 intro화면이 종료되면 timer를 명시적으로 cancel 시키고 싶습니다.
autoconnect() 역시 자동으로 연결, 취소를 관리한다고 하였으나, 취소되는 경우는 publisher를 구독하는 구독자가 모두 없어질 경우입니다.
저희는 SplashView가 사라지기 전까지는 timer를 onReceive에서 구독하고 있기 때문에, timer는 계속 이벤트를 방출하게 됩니다.
따라서 autoconnect() 기능을 제거하고 connect()를 사용하여 cancellable을 전달받고,
progress가 완료되면 cancellable.cancel()을 사용하여 timer를 해제해보도록 하겠습니다.
import SwiftUI
import Combine

struct SplashView: View  {
    @State private var progress: Float = 0.0
    @State private var isComplete: Bool = false
    @State private var cancellable: Cancellable?

    let duration: Double = 3.0

    //autoconnect()를 제거하여 connect()가 불리기전까지는 이벤트가 방출되지 않도록 하였습니다.
    var timer: Timer.TimerPublisher {
        Timer.publish(every: 0.01, on: .main, in: .common)
    }

    var body: some View {
        ZStack {
            VStack {
                Text("FLEEK")
                    .foregroundColor(.red)
                    .fontWeight(.heavy)
                    .font(.largeTitle)
                Text("당신의 운동을 의미있게!")
                    .foregroundColor(.white)

                ProgressView(value: progress)
                    .animation(.linear(duration: duration), value: progress)
                    .tint(.red)
                    .frame(width: 160)
            }
            .opacity(isComplete ? 0 : 1)
            .frame(maxWidth: .infinity, maxHeight: .infinity)
            .background(.black)
            MainTabView()
                .opacity(isComplete ? 1 : 0)
        }
        .onReceive(timer) { _ in
            print("timer is Running \(Date().timeIntervalSince1970)")
            if progress < 1.0 {
                progress = min(1.0, progress + 0.004)
            } else {
                withAnimation(.easeOut(duration: 1.0)) {
                    isComplete = true
                    print("progress complete")
                }
// progress가 100% 완료되면 cancellable?.cancel()을 통해 해당 publisher를 제거해줍니다.
                cancellable?.cancel()
            }
        }
// 해당 splashView가 appear 될 떄, timer.connect()를 호출하여 timer 이벤트가 방출되도록 합니다.
        .onAppear() {
//connect()메소드는 Cancellable protocol을 return합니다.
            cancellable = timer.connect()
        }
    }
}
이젠 취소 가능한 Cancellable property도 생성했기 때문에, 명시적인 취소가 가능해졌습니다.
빌드해서 동작을 확인해보도록 하겠습니다.

분명 timer를 명시적으로 connect() 시켰는데, 왜 timer 이벤트가 방출되지 않을까요??
코드를 한줄한줄 다시 살펴봅니다.. 👀
‼️이상한점이 발견되었습니다.
 var timer: Timer.TimerPublisher {
        Timer.publish(every: 0.01, on: .main, in: .common)
 }
바로 이부분입니다.
timer가.. computed property로 선언이 되어있었네요..
computed property이기 떄문에, timer에 접근할 때마다 새로운 Timer Publisher가 생성되어 리턴되게 됩니다.
따라서 onAppear에서 timer.connect()를 해준들.. onReceive에서 접근한 timer는 또다른 Timer Publisher일테니.. 동작을 하지 않을 수 밖에 없었네요.. 🙃
다시 코드를 수정해봅니다.
 var timer: Timer.TimerPublisher {
        Timer.publish(every: 0.01, on: .main, in: .common)
 }
var timer = Timer.publish(every: 0.01, on: .main, in: .common)
timer를 computed property가 아닌 변수로 정의하여 Timer.publisher instance를 직접 저장합니다.
import SwiftUI
import Combine

struct SplashView: View  {
    @State private var progress: Float = 0.0
    @State private var isComplete: Bool = false
    @State private var cancellable: Cancellable?
//좀더 편한 확인을 위해 변수를 추가하였습니다.
    @State private var completeText: String = ""
    @State private var time: TimeInterval = 0.0

    let duration: Double = 3.0

    var timer = Timer.TimerPublisher(interval: 0.01, runLoop: .main, mode: .common)
    var body: some View {
        ZStack {
            VStack {
                Text("FLEEK")
                    .foregroundColor(.red)
                    .fontWeight(.heavy)
                    .font(.largeTitle)
                Text("당신의 운동을 의미있게!")
                    .foregroundColor(.white)

                ProgressView(value: progress)
                    .animation(.linear(duration: duration), value: progress)
                    .tint(.red)
                    .frame(width: 160)
            }
            .opacity(isComplete ? 0 : 1)
            .frame(maxWidth: .infinity, maxHeight: .infinity)
            .background(.black)
            MainTabView()
                .opacity(isComplete ? 1 : 0)
//Text뷰를 통해서 타이머 동작과 timer가 더이상 호출되지 않는지 확인해보도록 하겠습니다.
            Text("timer is Running \(time)\n\(completeText)")
                .foregroundColor(.white)
                .font(.title)
                .frame(maxWidth: .infinity, maxHeight: .infinity, alignment: .top)
        }
        .onReceive(timer) { _ in
            time = Date().timeIntervalSince1970
            if progress < 1.0 {
                completeText = "isNotComplete"
                progress = min(1.0, progress + 0.004)
            } else {
                withAnimation(.easeOut(duration: 1.0)) {
                    isComplete = true
                    completeText = "completed"
                }
                cancellable?.cancel()
            }
        }
        .onAppear() {
            cancellable = timer.connect()
        }
    }
}
- 간단한 설명을 하자면 추가된 2개의 @State property는 timer가 호출될 때마다 Date().timeIntervalSince1970을 저장하여 0.01초 마다 timer 이벤트가 방출되어 time값이 변경되는지 확인하기 위한 프로퍼티입니다.
- completeText는 완료되었을 때 completed라는 string을 출력해주기위한 프로퍼티입니다.
다시한번 빌드하여 동작을 확인해보도록 하겠습니다.
정상적으로 timer가 동작하고, progress가 종료되면 정상적으로 cancel이 되는 것을 확인할 수 있습니다. 😄
다음 시간에는 MaintabView에 각각의 tabItem에 매칭되는 view들을 만들어가보도록 하겠습니다.
감사합니다.