SwiftUI 화면이 꽉 차지 않는 문제..
in Develop
어제 글..[Tuist 복원 삽질기]에서 마지막에 이야기했던.. 화면이 풀로 차지 않는 문제에 대한 해결법을 정리해보려고 합니다.
- 1차 삽질
import SwiftUI
import ComposableArchitecture

@main
struct MyFitnessWorkOutApp: App {

    init() {
        UITableView.appearance().backgroundColor = .clear
    }

    var body: some Scene {
        WindowGroup {
            SplashIntroView(store: Store(initialState: SplashFeature.State(), reducer: SplashFeature()))
                .edgesIgnoringSafeArea(.all)
        }
    }
}
메인화면에 .edgesIgnoringSafeArea(.all) 넣어보았습니다. → 결과는 변화 없음.
- 2차 삽질
struct SplashIntroView: View {

    let store: StoreOf<SplashFeature>

    var body: some View {
				MainTabView(store: Store(initialState: MainTabFeature.State(), reducer: MainTabFeature()))
						.edgesIgnoringSafeArea(.all)
//        WithViewStore(self.store, observe: { $0 }) { viewStore in
//            if viewStore.isActive {
//                MainTabView(store: Store(initialState: MainTabFeature.State(), reducer: MainTabFeature()))
//            } else {
//                GeometryReader { geo in
//                    VStack {
//                        LottieView(jsonName: "exercise", loopMode: .loop)
//                            .padding(10)
//                            .frame(width: 220, height: 220, alignment: .center)
//                        Text("My FitnessWorkOut")
//                            .fontWeight(.heavy)
//                            .foregroundColor(.white)
//                            .font(.headline)
//                    }
//
//                    .opacity(viewStore.viewOpacity)
//                    .onAppear {
//                        DispatchQueue.main.asyncAfter(deadline: .now() + 3.0) {
//                            viewStore.send(.loadingCompleted, animation: Animation.easeIn(duration: 0.7))
//                        }
//                    }
//                    .frame(width: geo.size.width, height: geo.size.height)
//                    .background(Color("introColor"))
//                }
//            }
//        }
    }
}
TCA의 WitViewStore에 뭔가 문제가생긴건 아닌가 싶어서 MainTabView만 리턴하도록 수정해보았으며 → 결과는 역시나 같았습니다.
- 3차 삽질
struct SplashIntroView: View {

    let store: StoreOf<SplashFeature>

    var body: some View {
        Text("Hello, world!")
            .padding()
//        WithViewStore(self.store, observe: { $0 }) { viewStore in
//            if viewStore.isActive {
//                MainTabView(store: Store(initialState: MainTabFeature.State(), reducer: MainTabFeature()))
//            } else {
//                GeometryReader { geo in
//                    VStack {
//                        LottieView(jsonName: "exercise", loopMode: .loop)
//                            .padding(10)
//                            .frame(width: 220, height: 220, alignment: .center)
//                        Text("My FitnessWorkOut")
//                            .fontWeight(.heavy)
//                            .foregroundColor(.white)
//                            .font(.headline)
//                    }
//
//                    .opacity(viewStore.viewOpacity)
//                    .onAppear {
//                        DispatchQueue.main.asyncAfter(deadline: .now() + 3.0) {
//                            viewStore.send(.loadingCompleted, animation: Animation.easeIn(duration: 0.7))
//                        }
//                    }
//                    .frame(width: geo.size.width, height: geo.size.height)
//                    .background(Color("introColor"))
//                }
//            }
//        }
    }
}
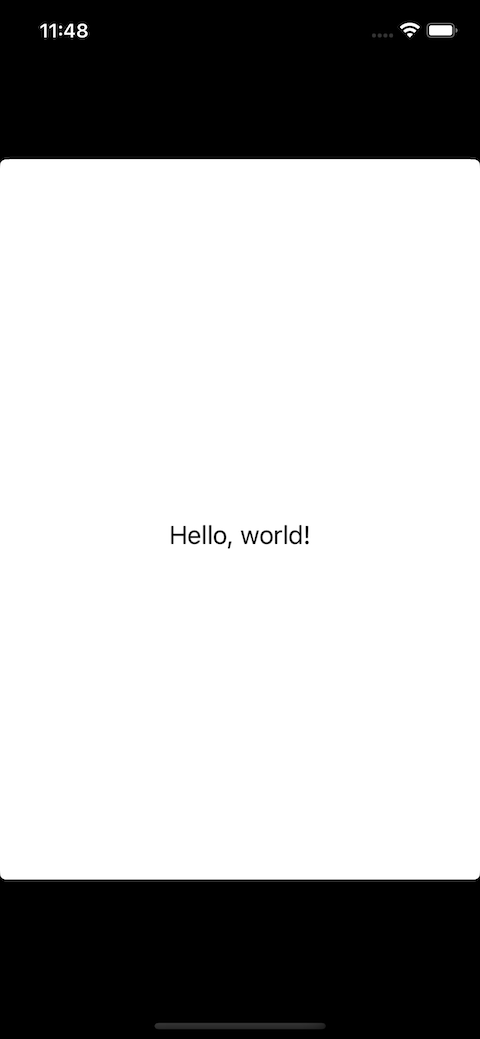
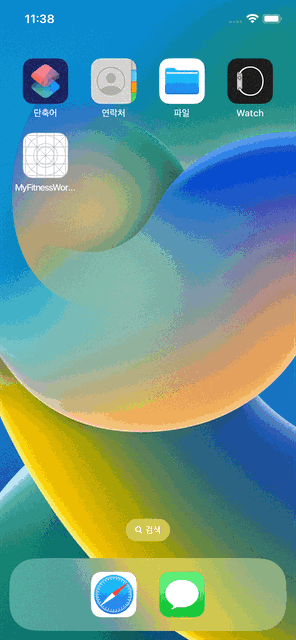
모든 뷰를 제거하고 기본 Text만 올려서 진행해보았더니 아래와 같은 결과가 나왔습니다.
기본 컴포넌트를 보여주는데도 꽉 차지 않는건 설정에 문제가 있다고 판단되어, 새로운 swiftUI 프로젝트를 생성하여 info를 비교해보았습니다.
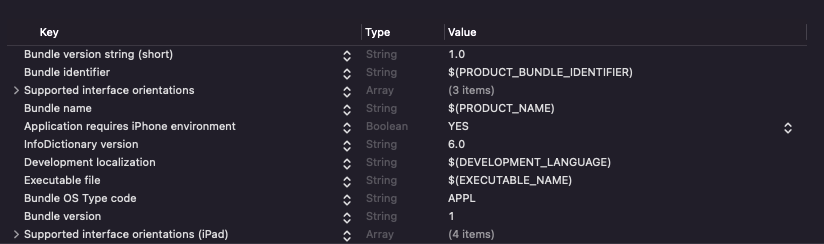
개발중인 프로젝트의 info 정보
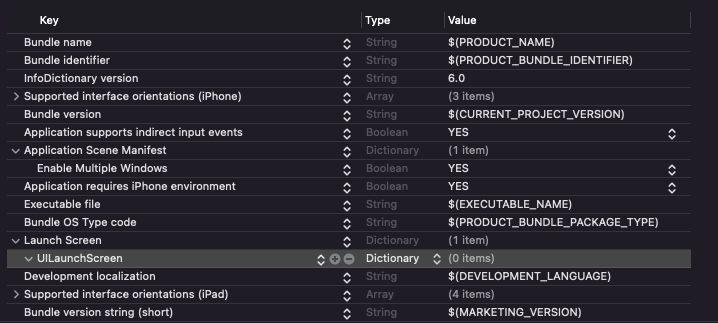
새로 생성한 SwiftUI 프로젝트의 Info 정보
기존 개발중인 프로젝트에도 동일한 Key-Value를 생성하여 줍니다.
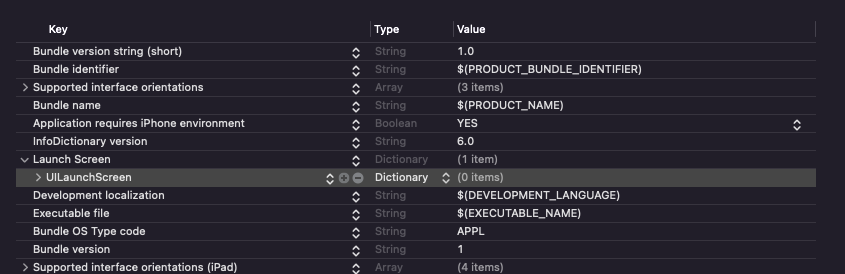
그리고 모든 코드를 원복하여 실행해 보았으며 결과는 다음과 같았습니다.
아주 잘 나오는것을 확인할 수 있었습니다.
무언가를 작업하다가 실수로 지워진것 같네요 ㅠㅠ
원인은 간단하지만 한눈에 보이지 않아서 이것저것 해보게 되었네요.
참고로 info에서 LaunchScreen 하위 key를 살펴보면 아래와 같은 종류들이 있습니다.

- Background Color : asset에 등록된 Color 이름을 적어주면, 해당 color의 배경색으로 설정할 수 있습니다.
- Image name : 말그대로 이미지를 사용하여 LaunchScreen을 설정합니다.
- Image respects safe area insets : 이미지를 사용할 경우 safeareaInsets을 비워둘지 채울지에 대한 Boolean 값입니다.
- Show Navigation bar : NavigationBar mock up을 노출합니다.
- Show Tab bar : Tabbar mock up을 노출합니다.
- Show Toolbar : Toolbar mock up을 노출합니다.
저는 참고로 Background Color로 설정하여 splash Intro 화면과 같은 색상으로 보이도록 하였습니다.